This guide will walk you through taking an brand new server to having a working Magento instance in 10 minutes or less. This guide follows all the recommended guidelines suggested by the Magento developers.
- A CentOS 8 server with at least 1GB for an archive based install or 2GB of RAM to use the Composer install.
- Basic knowledge of using the Linux command line.
- The hostname of your store must resolve (point) to the IP address of your server before you start this guide if you want to install an SSL certificate.
- An account with Magento. Login or sign up here. You will need to get your Access Keys from your Magento account. See the Magento instructions here on how to get those.
In order to begin these steps, you must SSH into your server as a sudo enabled non-root user.
Step 1 – Install all necessary packages.
Magento requires a web server, a database server, PHP and some PHP extensions in order to run.
We will use Apache2.4 and MariaDB as our web and database servers along with the default PHP version 7.2. The following commands will get all the required packages installed:
$ sudo dnf upgrade
$ sudo dnf install httpd mariadb-server php php-bcmath php-gd php-intl php-json php-mbstring php-mysqlnd php-opcache php-xml php-soap php-curl php-zip wget mod_ssl unzip
Next, we need to start MariaDB and Apache2 and ensure that they start on boot. This can be done with a single command for each service with systemctl:
$ sudo systemctl enable --now mariadb
$ sudo systemctl enable --now httpd
The enable option creates the files needed to prompt systemctl to start the services on boot and the --now options instructs systemctl to start the servers immediately.
Optional step - Create some system swap
If you’re trying to install Magento on a VPS there may not be any system swap space that can cause the installer to fail. If your system has 1GB of RAM it’s a good idea to create some system swap and even if you have a 2GB system Composer can fail without some swap space available.
You can check if there if your system has swap by running the free command:
$ sudo free -m
 total used free shared buff/cache available
Mem: 1829 266 76 18 1486 1399
Swap: 0 0 0
On this system, the three 0’s on the swap line shows there is no system swap. The following commands will create a swapfile and configure the system to use this file for swap.
First, create the swap directory:
$ sudo mkdir /swap/
Next, create a 2GB file that will hold the swap data:
$ sudo dd if=/dev/zero of=/swap/swapfile bs=1MB count=2048
You can change the size of the swap file by modifying the count=2048 number to the amount of MB’s you want. Next, give it the recommended 600 permissions:
$ sudo chmod 600 /swap/swapfile
Format it:
$ sudo mkswap /swap/swapfile
And finally, enable as the system swapfile:
$ sudo swapon /swap/swapfile
This configuration will only work until the next reboot which will probably be enough to complete the installation. If you want to make this permanent add the following line to /etc/fstab:
/swap/swapfile none swap sw 0 0
Your system will now use the swap file after a reboot.
Step 2 – Create a system user and Magento’s root directory.
The Magento developers recommend, for security reasons, that a non-root system user is created and given ownership of the Magento instance files and directories.
We will create a user called magento and add them to the web server’s group with the following commands:
$ sudo adduser magento
$ sudo usermod -a -G apache magento
Now, create the Magento installation root directory:
$ sudo mkdir /var/www/magento
Then set the correct ownerships on this directory:
$ sudo chown magento:apache /var/www/magento
Next, we need to create and configure the database that Magento will use.
Step 3 – Creating a database
In order to create a database, we need to first enter the MariaDB shell. This is simply done by entering the command sudo mysql on the command line. When you do that you will be immediately taken to the MariaDB shell that will supply a new prompt that looks like this:
MariaDB [(none)]>
The following command will create a new database called magentodb:
CREATE DATABASE magentodb;
Next, we will create a new user called magento and assigned them full permissions to the new database with the following command:
GRANT ALL ON magentodb.* TO magento@localhost IDENTIFIED BY '<STRONG PASSWORD>';
You must change to a secure password when you enter this command. Make a note of the database name, username and password as they will be required later. After you have done this log out of the MariaDB shell by entering exit;
It is a good idea to validate the database we just created along with the username and password. This is done by logging into the MariaDB shell as the new user with the following command:
$ mysql -u magento -p magentodb
If you can log in using the password you set in the GRANT ALL command then the new database and user are working correctly.
Step 4A – Installing Magento with Composer (2GB RAM Required)
If your system has less than 2GB of RAM skip this section and use the archive-based install in Step 4B.
Composer is a dependency manager for PHP that Magento uses to download all the components for Magento. Please note, Magento only supports Composer version 1x. This is the version shown in the instructions below.
First, change to Magento’s home directory:
cd /var/www/magento/
Next, download the latest Composer 1x version:
wget https://getcomposer.org/composer-1.phar
Next, make it execuitble:
chmod 755 composer-1.phar
Make this a system command by moving it to a directory on the system path:
$ sudo mv composer-1.phar /usr/local/bin/composer
Now that composer is installed we can use it to download Magento with the following command:
composer create-project --repository=https://repo.magento.com/ magento/project-community-edition /var/www/magento/
You will be prompted for a username and password. You will need to enter:
Username = <PUBLIC KEY>
Password = <PRIVATE KEY>
The keys are the ones that you copied from your Magento marketplace account.
When the update finishes run the following commands to set the correct ownerships and permissions on the downloaded files and directories:
cd /var/www/magento
find var generated vendor pub/static pub/media app/etc -type f -exec chmod g+w {} +
find var generated vendor pub/static pub/media app/etc -type d -exec chmod g+ws {} +
chown -R magento:apache /var/www/magento/
chmod u+x bin/magento
SELinux will stop Apache and PHP from writing to directories in the Magento root. The following commands will allow write access:
sudo restorecon -R /var/www/magento
sudo setsebool -P httpd_unified 1
Magento is now downloaded and ready to get served after Apache is configured.
Step 4B – Installing Magento from an archive
Here we will install Magento from an archive downloaded from the Magento website. This install method will work happily on systems with much less than 2GB of RAM.
The archive containing Magento is downloaded from this page:
https://magento.com/tech-resources/download
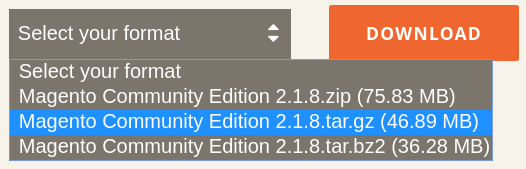
You should select version 2.3.x without sample data. We will use the .tar.gz version as this is the most widely supported compression format. The tar.gz archive is shown here (although an older version number):
You must create an account to download the file. Once you have downloaded the file you will need to upload it to your server.
After you have uploaded the archive to your server you need to log back into your server and unpack the Magento archive to /var/www/magento:
$ tar -vxf /path/to/Magento-archive.tar.gz --directory /var/www/magento
You can now delete the Magneto archive if you want to.
Next, we will set recommended ownerships and permissions. The following commands must be run from the installation directory, i.e. /var/www/magento, so the first command will move you to that directory:
cd /var/www/magento
find var generated vendor pub/static pub/media app/etc -type f -exec chmod g+w {} +
find var generated vendor pub/static pub/media app/etc -type d -exec chmod g+ws {} +
chown -R magento:apache /var/www/magento
chmod u+x bin/magento
SELinux will stop Apache and PHP from writing to directories in the Magento root. The following commands will allow write access:
sudo restorecon -R /var/www/magento
sudo setsebool -P httpd_unified 1
We will finish installing Magento from an installation page accessed by a browser after Apache is configured.
Step – 5 Configuring Apache
Apache, PHP and all the necessary extensions were installed at the beginning of this guide. All that is left is to add the required configuration to serve the Magento instance.
First, change into the Apache’s configuration directory:
cd /etc/httpd/conf.d/
Then, use your preferred text editor to create and open a website.conf file. You should choose a name for this file that reflects the name of the website for easier management later. Here we will use nano and the file will be called example.com.conf:
$ sudo nano example.com.conf
We will use the following VirtualHost template. Copy and paste the following into the new file:
<VirtualHost *:80>
    ServerName <STORE HOSTNAME>
    DocumentRoot /var/www/magento
    ErrorLog /var/log/httpd/magento_error.log
    CustomLog /var/log/httpd/magento_access.log combined

    <Directory /var/www/magento >
        Options FollowSymLinks
        AllowOverride All
    </Directory>

</VirtualHost>
You need to change <STORE HOSTNAME> to the name that you will use for your store e.g. store.example.com.
If there are no problems Syntax OK will be printed to the screen. If there is an issue the output will tell you the file and line that has the error. When you can pass the configuration test run the following command to reload Apache:
$ sudo systemctl reload httpd
Apache is configured to serve the Magento instance via HTTP. This is required to get the free SSL certificate installed in the next section.
Step 6 - Install an SSL certificate
In this step, we will install the SSL (TLS) certificate for your store so that you will be able to secure it with HTTPS. We will use a free Let’s Encrypt certificate that will work in all browsers and the CertBot application to install the certificate and keep it updated.
First, download the required packages and create a new system binary:
cd /home/magento
wget https://dl.eff.org/certbot-auto
$ sudo mv certbot-auto /usr/local/bin/certbot-auto
$ sudo chown root /usr/local/bin/certbot-auto
$ sudo chmod 0755 /usr/local/bin/certbot-auto
Next, run the certbot command that will download and install all of its dependencies:
$ sudo /usr/local/bin/certbot-auto --apache
NOTE If you get the following error:
Error while running apachectl configtest.

AH00526: Syntax error on line 85 of /etc/httpd/conf.d/ssl.conf:
SSLCertificateFile: file '/etc/pki/tls/certs/localhost.crt' does not exist or is empty
Then simply restart Apache e.g.:
$ sudo systemctl restart httpd
And re-run sudo /usr/local/bin/certbot-auto --apache.
You will then be prompted to enter an email address for the certificate. After you have entered that you must agree to the T&C’s and decide if you want to share your email address with the Electronic Frontier Foundation. This last step is optional.
The final prompt will ask you if you want to allow HTTP and HTTP access to your store or if you want HTTPS only. If you opt for the latter HTTP requests will get redirected to the HTTPS site. HTTPS only is the more secure and is the recommended, modern option.
Reload Apache again to load all the new configuration:
$ sudo systemctl reload httpd
Finally, we need to get the certificate renewed automatically. We will do this by adding a line to /etc/crontab by running the following command:
$ echo "0 0,12 * * * root python -c 'import random; import time; time.sleep(random.random() * 3600)' && /usr/local/bin/certbot-auto renew" | sudo tee -a /etc/crontab > /dev/null
Your web store is now protected with a free SSL certificate which will get automatically renewed before it expires.
Step – 7 Installing Magento
We will install Magento by accessing the installation page in a web browser. You need to browse to the https:// address of your store. Follow the on-screen instructions to complete the installation. You will need to enter the database details that you used when you created the Magento database, magentodb.
Make sure that you note down the admin URL, passcodes and any other information as you set them during the installer as the installer does not always display the Success page.
When the installation has finished you will see a Success page listing all the details of your Magento installation. You should copy and paste all this information into a file for future reference.
Note: I have had the installer page halt here at around 74% even though the installation has completed. Check the install log file at /var/www/magento/var/log/install.log for “Magento installation complete”. If you see that then Magento is installed and you just need to visit the admin pages you chose earlier.
The final task for this installation is to create the Magento cron jobs.
Step 8 – Creating the Magento cron jobs
Magento requires several periodic, backend tasks to keep the installation working correctly. Linux has a specific program called cron which is designed to run tasks or jobs at intervals. Magento provides a tool to create the correct cron entries to keep everything up-to-date.
Move to the Magento’s root directory:
cd /var/www/magento
When you are there run the following command:
$ bin/magento cron:install
Crontab has been generated and saved
You can check what was written to the crontab with the following command:
crontab -l
You should see something like the following:
#~ MAGENTO START d1957f62aa710cc367525c9ec68dd7456d4311756b5aa37d2143c4a98b25318c
* * * * * /usr/bin/php /var/www/magento/bin/magento cron:run 2>&1 | grep -v "Ran jobs by schedule" >> /var/www/magento/var/log/magento.cron.log
* * * * * /usr/bin/php /var/www/magento/update/cron.php >> /var/www/magento/var/log/update.cron.log
* * * * * /usr/bin/php /var/www/magento/bin/magento setup:cron:run >> /var/www/magento/var/log/setup.cron.log
#~ MAGENTO END d1957f62aa710cc367525c9ec68dd7456d4311756b5aa37d2143c4a98b25318c
Magento is now fully installed and working.
Conclusion
We have now completed a Magento 2 installation following the recommendations of the Magento developers. A good idea at this point is to take a backup of your server or VM before you customize your Magento installation. This will give you an excellent starting point to return to if you mess up your installation or if you simply want to experiment with Magento before settling on a production version.