Introduction
Before you can start mining cryptocurrency you need a GPU rocking rig to do all the hard work. Amazon AWS is the world leader in providing computing resources on demand. Normally, spinning up a GPU enabled rig to use for mining is going to get expensive. Fortunately, AWS provide spot instances at a 70-90% discount.
These instances are so cheap because they can, and will, go away with only a few minute’s notice. Spot instances let Amazon rent out unused computing capacity that they will reallocate to full paying customers when they request it. This arrangement suits crypto mining well because mining happens in small chunks so losing a few minute’s work is nothing against the 90% saving.
Create An AWS Account
The first thing that you need to do is to sign up for an AWS account. Even though AWS is owned and run by Amazon you can’t use your Amazon account for this. The signup process isn’t difficult, just head on over to the signup page here:
https://portal.aws.amazon.com/billing/signup#/start
You are going to have to supply some credit card details to get started. You won’t get billed until you spin up an instance and you’ll only get billed for the time your instance is running.
Spin Up A GPU Instance
There are an insane number of instance types and services available on AWS. Finding a cheap GPU spot instance can be difficult if you haven’t used the AWS interface before. Follow these steps to spin up your first instance.
Once you have created your account the first thing you need to do is to get to the EC2 section of the AWS interface. Do this by:
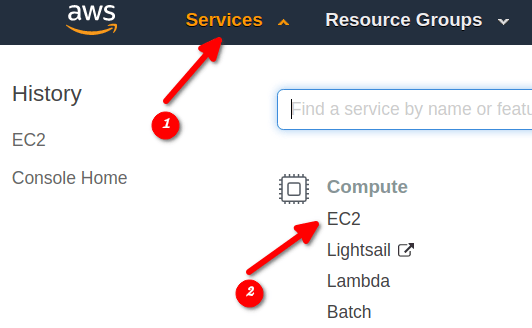
- Click on Services
- Click on EC2
Create an SSH Key Pair
You will need to access your server via SSH using a key pair. Before you launch your first instance create an SSH key pair. Follow my How To Create AWS SSH Keys guide to quickly create a pair.
Create and Launch a GPU Spot Instance
In the navigation panel on the left, click on Instances. This page will show you any running instances and also is where to launch a new one. Start the launch process by clicking on:

Step 1: Choose an AMI (Amazon Machine Image)
The AMI is the operating system that your instance will run. As we want to use the NVIDIA GPU for coin mining choose an AMI that has all the drivers and libraries already installed. I recommend selecting an Ubuntu Deep Learning AMI, this is the one I choose:
Deep Learning AMI (Ubuntu 18.04) Version 30.0 - ami-08bf49c7b3a0c761e
Step 2: Choose an Instance Type
Here, you will choose the type of instance you want. Narrow the options by using the Filter by: dropdown:
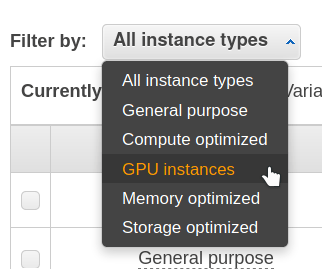
The cheapest option is the g4dn.4xlarge.
Step 3: Configure Instance Details
This is the page that allows you to select a spot instance and get a GPU at a discount. Select the Purchasing option Request Spot instances option:
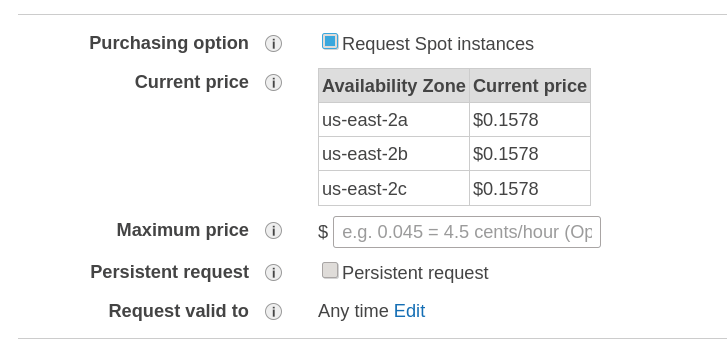
When you check this you will see the current price of the instance. In this case, it’s $0.15 USD per hour.
You can leave everything else with the default settings.
Step 4: Add Storage
This instance comes with lots of disk space so you can leave this with the default settings.
Step 5: Add Tags
This section is for the organization of large numbers of instances. You don’t need to touch anything here.
Step 6: Configure Security Group
This section allows you to configure the external firewall. The default rule allows SSH access from all IPv4 IP addresses. This is an OK option but you can make it more secure by locking SSH access to only your IP address. This will cause you a problem if you want to connect from a different location or if your ISP changes your IP, which is very common.
You can always log back into AWS and add any new IP addresses if you need to.
Step 7: Review Instance Launch
This section shows you a summary of the instance details. If you are happy with it hit Launch.
Choose your SSH keys
Before the instance launches you must choose the SSH keys your created earlier:
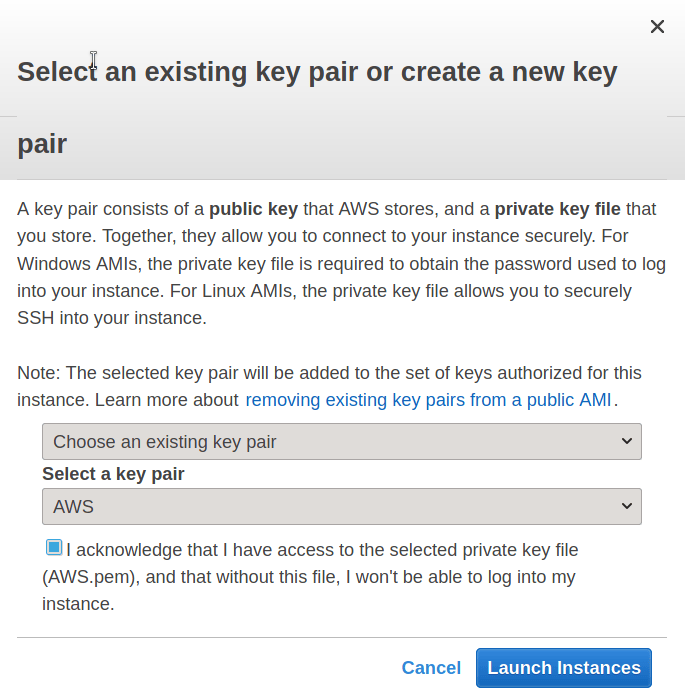
Choose your keys from the dropdown, check the box and start your instance by clicking on the Launch Instances button.
You will be billed from the minute you launch the instance!
Get Your Instance’s IP and Log In
Your instance is now running and listed under the Instances section. Browse there and collect it’s IP address from the IPv4 Public IP column.
You cannot log in as the user root. Instead, log in as user ubuntu.
You’re now ready to start mining those coins!